keurig k select manual

The Keurig K-Select is a single-serve coffee maker designed for convenience and flavor, offering a user-friendly experience with K-Cup pods from top coffee brands.
1.1 Overview of the Keurig K-Select Coffee Maker
The Keurig K-Select is a single-serve coffee maker designed for coffee lovers seeking convenience and customization. Compact and user-friendly, it offers a range of brew sizes and a strong brew option for bold flavors. Compatible with Keurig’s K-Cup pods, it allows users to explore a variety of coffee blends and flavors effortlessly. With its sleek design, the K-Select fits seamlessly into any kitchen, providing a hassle-free coffee experience. Its intuitive interface makes it easy to navigate, while its programmable features ensure a perfect cup every time. Whether you prefer a quick morning brew or a midday pick-me-up, the K-Select delivers quality and consistency in every cup.

1.2 Key Features of the K-Select Model
The Keurig K-Select stands out with its strong brew option, allowing users to enjoy a bolder cup of coffee. It features four brew sizes (6, 8, 10, and 12 ounces) for customizable servings. The machine includes a large 52-ounce water reservoir, reducing the need for frequent refills. Its intuitive design offers a backlit display for easy navigation, and it brews coffee in under one minute for quick convenience. The K-Select is compatible with the My K-Cup Universal Filter, enabling users to brew ground coffee. Additional features include a removable drip tray for easy cleanup and programmable controls for temperature and brew strength. These features make it a versatile and efficient coffee maker for various preferences and needs.
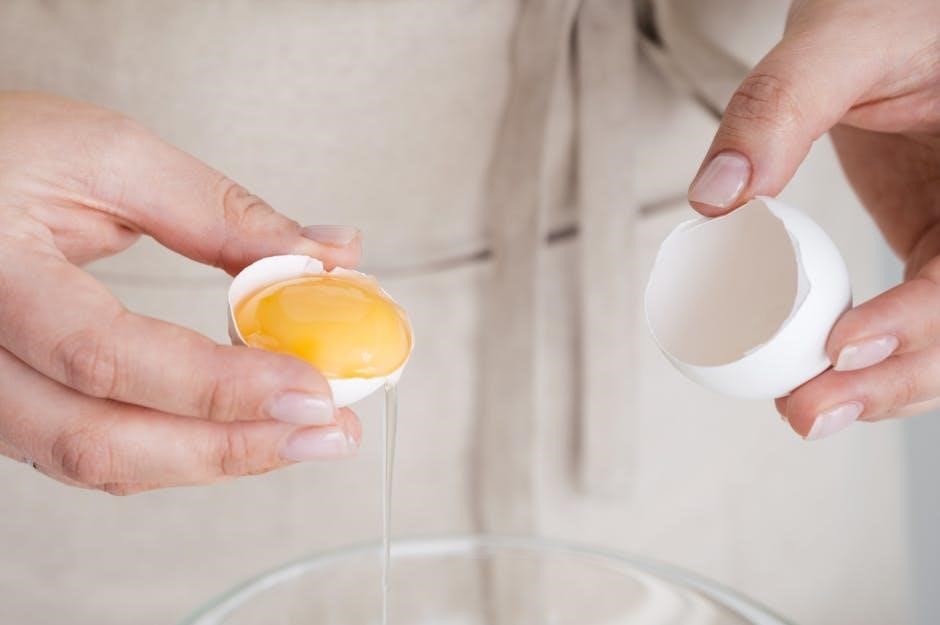
Unboxing and First Impressions
The Keurig K-Select arrives neatly packaged with a sleek design and sturdy build, offering a seamless unboxing experience. Its compact size and intuitive layout make it easy to set up, leaving a strong first impression of quality and convenience.
2.1 What’s Included in the Box
Inside the Keurig K-Select box, you’ll find the coffee maker itself, a removable 52-ounce water reservoir, a K-Cup pod holder, and a power cord. Additionally, Keurig includes a water filter starter kit to ensure optimal water quality. The packaging also contains a user manual and a quick-start guide to help you get acquainted with the machine’s features. Some models may also include a sample pack of K-Cup pods to let you try different flavors right away. The contents are neatly organized, making unpacking and setup straightforward. Everything you need to begin brewing is provided, allowing for a seamless out-of-the-box experience;
2.2 Initial Setup and Preparation
After unboxing, plug in the Keurig K-Select and place it on a flat surface. Fill the 52-ounce water reservoir with fresh water and ensure it’s properly aligned with the machine. To prime the brewer, fill the reservoir with filtered water and run a brew cycle without inserting a K-cup. This flushes out the internal system. Allow the machine to heat up, which should take a few minutes. Once heated, run a cleansing brew by selecting the smallest cup size and letting the machine dispense hot water. Discard the water and rinse the reservoir. Repeat this process if you notice any residual taste from the manufacturing process. This ensures your first brew is clean and flavorful. Refer to the user manual for specific button sequences, such as pressing and holding the “Small Cup” button for priming.
Setting Up the Keurig K-Select
Position the machine in your kitchen, plug it into a power outlet, and prepare it for brewing by following the initial setup steps.
3.1 Placing the Machine in Your Kitchen
When placing the Keurig K-Select in your kitchen, choose a stable, flat surface near a power outlet. Ensure the machine is at a comfortable height for easy access. Position it away from direct sunlight to prevent overheating and within reach of a water source. Leave about 4-6 inches of clearance around the machine for proper airflow. Avoid placing it near flammable materials or in high-traffic areas to minimize accidental knocks. Ensure the surface is clean and dry before setting up. Proper placement enhances safety, convenience, and overall performance of the brewer.
3.2 Connecting to a Power Source
To connect the Keurig K-Select to a power source, locate the machine’s power cord, which is typically stored at the back or underside of the brewer. Plug the cord into a nearby electrical outlet rated for 120V AC. Ensure the outlet is not shared with other high-power appliances to avoid voltage drops. Avoid using extension cords or power strips, as they may cause instability. Once plugged in, the machine will automatically enter standby mode, indicated by a dimly lit power button. Make sure the cord is securely connected to both the machine and the outlet to prevent accidental disconnection. Keep the cord away from hot surfaces or water sources to maintain safety. This setup ensures reliable operation and minimizes risks of electrical issues.
3.3 Priming the Brewer for First Use
To prime the Keurig K-Select, ensure the water reservoir is filled with fresh, filtered water. Plug in the machine and allow it to power up. Place a large cup under the spout to catch the water during the priming process. Lift the handle and lower it without inserting a K-Cup pod. Press the brew button to run a hot water cycle. Repeat this process once more to fully prime the internal water lines. This step ensures the machine is ready for brewing and removes any air bubbles or debris. Avoid using a K-Cup pod during priming, as it could result in improper function. Once complete, the machine is prepared for its first use.
Brewing Options and Customization
The Keurig K-Select offers customizable brewing options, allowing users to tailor their coffee experience. Adjust brew sizes, strength settings, and explore various K-Cup pod flavors for ultimate flexibility.
4.1 Understanding Brew Sizes and Strength Settings
The Keurig K-Select offers multiple brew size options, including 6, 8, 10, and 12 ounces, allowing you to customize the amount of coffee to your preference. Additionally, the machine features a strength setting that lets you choose between a regular or bold brew. This option enhances the flavor profile by adjusting the brew time, ensuring a more intense taste for those who prefer a stronger cup. The combination of size and strength settings provides flexibility, catering to individual preferences. Whether you like a small, robust coffee or a larger, milder cup, the K-Select accommodates your needs. This level of customization ensures a personalized brewing experience every time.
4.2 Using K-Cup Pods for Brewing
Using K-Cup pods with the Keurig K-Select is straightforward and convenient. Simply lift the machine’s handle to access the pod holder, insert your chosen K-Cup pod, and lower the handle to secure it. The K-Select is designed to work exclusively with K-Cup pods, offering a wide variety of coffee, tea, and other beverages. The machine automatically reads the pod and brews according to its specifications. For optimal performance, ensure the pod is properly aligned and the handle is fully closed. The K-Select’s one-touch button makes brewing easy, and the used pod is automatically punctured and stored in the machine’s drip tray. This system ensures a mess-free and efficient brewing process, allowing you to enjoy your favorite beverages with minimal effort.
4.3 Utilizing the My K-Cup Universal Filter
The My K-Cup Universal Filter allows you to brew using your own ground coffee, offering flexibility beyond K-Cup pods. To use it, rinse the filter with fresh water, then fill it with your preferred coffee grounds. Attach the filled filter to the holder and align it with the machine’s pod area. Close the lid securely to ensure proper brewing. The K-Select will detect the My K-Cup and brew your custom coffee. This feature is ideal for those who prefer grinding their own beans or exploring different roasts. After brewing, rinse the filter thoroughly to prevent residue buildup. This option enhances customization and allows you to enjoy a more personalized coffee experience with your Keurig K-Select.

Maintenance and Cleaning
Regular cleaning ensures optimal performance. Wipe surfaces daily and descale every 3-6 months to remove mineral buildup. Empty the drip tray and pod container frequently to maintain hygiene and prevent odors.
5.1 Cleaning the K-Select Brewer
Cleaning the Keurig K-Select is essential for maintaining its performance and hygiene. Start by turning off the machine and unplugging it for safety. Wipe down the exterior with a damp cloth, paying attention to areas around the brew head and water reservoir. Remove and empty the drip tray and pod container, washing them with warm soapy water. The water reservoir can also be cleaned by rinsing it thoroughly. For deeper cleaning, Keurig recommends using their cleaning solution or a mixture of equal parts water and white vinegar. Run a cleaning cycle if available or brew without a pod to flush the system. Avoid using abrasive cleaners or scrubbers, as they may damage the surfaces. Regular cleaning prevents mineral buildup and bacteria growth, ensuring fresh-tasting coffee every time. Always allow the machine to dry thoroughly after cleaning to prevent water spots.
5.2 Descaling the Machine for Optimal Performance
Descaling the Keurig K-Select is crucial to remove mineral buildup that can affect its performance; Use Keurig’s official descaling solution or a mixture of equal parts water and white vinegar. Start by turning off and unplugging the machine. Pour the solution into the water reservoir and run brew cycles without a pod until the reservoir is empty. Repeat if necessary. After descaling, rinse the machine by running multiple cycles with fresh water to remove any residue. Regular descaling, ideally every 3-6 months, prevents damage from limescale and ensures optimal brewing. This maintenance step is vital for preserving the machine’s longevity and maintaining the quality of your coffee. Always refer to the Keurig manual for specific guidance.
5.3 Troubleshooting Common Issues
Troubleshooting common issues with the Keurig K-Select ensures smooth operation. If the machine doesn’t turn on, check the power cord connection and ensure it’s properly plugged in. For issues with water dispensing, descale the machine as mineral buildup may block water flow. If the brew button isn’t responsive, unplug the machine, wait 30 seconds, and restart it. Error messages like “More Water” indicate the water reservoir is empty or not properly aligned. Clean the needle regularly to prevent clogs from leftover coffee grounds. For persistent problems, reset the machine by unplugging it and holding the brew button for 5 seconds while plugging it back in. Refer to the Keurig K-Select manual for detailed solutions to specific error codes and operational hiccups.
Programming and Customization
The Keurig K-Select allows users to program their preferences, including brew strength and size, for a personalized coffee experience tailored to their preferences effortlessly.
6.1 Setting Up Favorite Brew Settings
The Keurig K-Select allows users to program their favorite brew settings for convenience. Start by selecting your preferred brew size, ranging from 6 to 12 ounces, and choose the strength setting. You can also adjust the temperature to suit your taste preferences. Once selected, these settings are saved automatically and will be used for future brews unless changed. This feature ensures a consistent and personalized coffee experience every time; It’s ideal for households with multiple users, as each person can quickly access their saved preferences. Simply navigate through the control panel, confirm your choices, and enjoy your perfectly tailored cup of coffee with minimal effort.
6.2 Adjusting Temperature and Brew Strength
The Keurig K-Select offers customizable temperature and brew strength options to tailor your coffee experience. Users can adjust the temperature between 187°F and 198°F to achieve their preferred warmth level. For brew strength, choose from regular or bold settings to suit your taste preferences. The bold setting slows the flow rate to extract more flavor from the coffee grounds, resulting in a richer cup. These adjustments can be made directly on the control panel, ensuring ease of use. By fine-tuning these settings, you can optimize your coffee’s flavor profile and enjoy a more personalized brewing experience. This feature enhances versatility, making the K-Select suitable for a variety of coffee lovers’ preferences.

Tips for Optimal Performance
Regularly clean the machine, use filtered water, and store K-Cup pods in a cool, dry place. Perform routine descaling to prevent mineral buildup and ensure consistent brewing quality. Follow these tips to maintain peak performance and extend the lifespan of your Keurig K-Select coffee maker.
7.1 Using High-Quality Water
Using high-quality water is essential for optimal performance of your Keurig K-Select. Water quality directly impacts the taste of your coffee and the longevity of the machine. To ensure the best flavor, use fresh, filtered, or bottled water with a low mineral content. Avoid using tap water with high levels of minerals, as it can lead to scaling and affect the machine’s functionality. If you notice hard water buildup, consider using a water filter or a Keurig water filter cartridge. Always check the water level in the reservoir before brewing and refill as needed. Clean water ensures a better-tasting coffee and prevents potential damage to the brewer.
7.2 Storing K-Cup Pods Properly
Proper storage of K-Cup pods is crucial to maintain their flavor and aroma. Store the pods in a cool, dry place away from direct sunlight and moisture. Avoid exposing them to extreme temperatures, as this can affect the quality of the coffee; Use the pods within a few months of opening to ensure optimal taste. Keep them in their original packaging or transfer them to an airtight container to protect them from air and light. Do not store K-Cup pods in the freezer, as this can cause the seams to expand and potentially damage the pod. Always check the expiration date on the packaging before use for the best brewing experience.
7.3 Regular Maintenance Tasks
Regular maintenance is essential to ensure the Keurig K-Select continues to function efficiently. Clean the machine weekly by wiping down surfaces and emptying the drip tray. Check and rinse the water reservoir regularly to prevent mineral buildup. Every 3-6 months, descale the brewer to remove lime and mineral deposits, following the manufacturer’s instructions. Inspect the K-Cup holder and funnel for residue and wash them with soap and warm water. Replace worn-out parts, such as the water filter, as recommended. Proper upkeep extends the lifespan of your Keurig and ensures consistent performance. A clean machine also prevents bacterial growth and maintains the taste of your coffee.

Safety Precautions
Always handle hot surfaces with care, keep children away, and avoid misuse. Ensure proper electrical connections and follow all guidelines to prevent accidents.
8.1 Important Safety Information
Always prioritize safety when using the Keurig K-Select. Avoid touching hot surfaces like the brew head or mug stand. Keep children away from the machine during operation. Ensure the brewer is placed on a stable, heat-resistant surface. Never submerge the machine in water or expose it to excessive moisture. Use only Keurig-approved K-Cup pods to avoid damage or hazards. Avoid overloading the water reservoir and ensure proper electrical connections. Do not operate the machine if it is damaged or malfunctioning. Regularly clean and descale to prevent mineral buildup. Follow all instructions in the manual to ensure safe and optimal performance. Always unplug the machine when not in use or during maintenance.
8.2 Avoiding Common Mistakes
To ensure a smooth experience with your Keurig K-Select, avoid common mistakes. Never use damaged or incompatible K-Cup pods, as they may cause machine malfunction. Avoid overfilling the water reservoir beyond the max line, which can lead to leaks. Do not forget to prime the machine before first use, as this step is crucial for proper function. Always ensure the brew head is clean and free of debris to prevent clogs. Avoid placing the machine near flammable materials or in humid environments. Never skip descaling, as mineral buildup can damage the machine. Finally, always follow the manual’s guidelines for troubleshooting to prevent unnecessary repairs.
The Keurig K-Select is a versatile, easy-to-use coffee maker that delivers excellent results. Its customizable features make it a great choice for any coffee enthusiast.
9.1 Summarizing the K-Select Experience
The Keurig K-Select offers a seamless and satisfying coffee-making experience. Its intuitive design and robust features, such as customizable brew strength and size options, cater to diverse preferences. The machine’s ease of use, paired with its compact design, makes it a practical addition to any kitchen. While it excels in convenience and consistency, some users may find the noise level slightly higher than expected. Overall, the K-Select strikes a balance between performance and simplicity, making it a solid choice for both casual drinkers and coffee enthusiasts. Minor drawbacks, like the reliance on K-Cup pods, don’t detract from its overall value as a reliable brewing companion.
9.2 Recommending the K-Select to Others
The Keurig K-Select is an excellent choice for anyone seeking a user-friendly and versatile single-serve coffee maker. Its robust features, such as strong brew options and customizable sizes, make it ideal for both casual coffee drinkers and enthusiasts. The sleek design and compact footprint ensure it fits seamlessly into any kitchen. If you value convenience and variety, this model is a standout option. Its ease of use and maintenance make it a practical recommendation for busy households or offices. Overall, the K-Select delivers consistent performance and quality, making it a worthwhile investment for anyone looking to elevate their coffee experience.


Leave a Reply
You must be logged in to post a comment.